9.14.2010

A peek inside my Studio

I thought it might be fun to show you a little peek into my studio. I was taking some pictures this past weekend, and it was fairly clean, so a good time to snap some shots! Here is an overall view of the room with my sewing area and cutting table. In our home in Indiana I had turquoise walls, which I miss dearly. This is way bland for my taste, but it works for now!


A different view including my window overlooking the canal.


Some Scrapbooking Supplies / Stash


A jar with my leftover bindings / triangles left

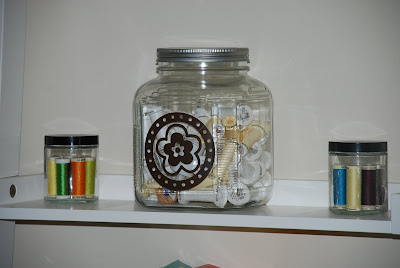
My many colors of thread for appliqueing and the left-over spools...I don't have anything else to fill this jar just yet, and it's somewhat rewarding to know how much you've sewn and used your beloved machine!
Lots o' ribbon for crafting

And that's the tour! As my number of quilting projects grows I may need to find a new way of organizing. Believe it or not my fabric stash is limited to 1 large metal basket housed in our laundry room shelving. I have 1 small bag on the floor inside my cutting table where i throw my scraps. I have only made a handful of quilts (less than 10) so i don't have a need to color sort scraps or organize them further at this point. It has taken much willpower to keep my stash at this level...as you can tell my scrapbooking hobby didn't include the same willpower! I am living the motto 'less is more' and using what i have, as hard as it is!

9.13.2010

what i'm working on....

Here's a look at what I'm working on this week:

I finished 4 of the strip quilt blocks and have 4 more in process, a look at what a 'big' block will look like - do you see the 'X' through the middle that forms when you put them together?


Here is one of the Robot blocks for my bigger guy - he wants a new quilt. It will have oranges, greys and blues. A bigger modern pattern - inspiration here.

And here is a new small system for organizing projects (instead of piles on my cutting table / ironing board) It will work for now. Top row: placemats / sailboat quilt. 2nd row: Strip quilt blocks / fabric. 3rd Row: Pillowcase / fabric backing / Improv quilt fabric.

I have 4 more placemats done and pinned ready for quilting and binding. A bigger look at my studio / sewing space tomorrow!

9.11.2010

i'm a winner!

One of my favorite things about reading blogs, besides the inspiration and friendships, is the chance at a random giveaway. You leave a comment and then cross your fingers all week in hopes that you've been chosen by the random generator. Do you comment first, last or somewhere in-between....what are my chances? I have left many comments and never won a quilt-blog giveaway until about 2 weeks ago!!! Not only did i win this giveaway, but I won something awesome!

I joined the Improv(e) Your Butt Challenge on Tallgrass Prairie Studio's Blog and by completing my weekly goal was able to enter to win part of her scrappy stash. After finding out I was the winner I will admit I stalked the mailbox / carrier for about 10 days and was so excited to find it in the post.

An overall view of my goody bag

A little bit better pic of each fabric. I can't decide what to do with these....the challenge is to exercise more regularly and the reward part was a piece of fabric for every mile completed - forming an improv project / quilt. I thought it would be perfect to use this stash to start my improv project.

My absolute favorite scrap!

The collection of my most favorite scraps out of the pile!

9.09.2010

String Quilt Blocks

I love the look of the string quilt block and how the 4 blocks form a pattern with just the strip in the center. I'm trying to use up the rest of this older Amy Butler Fabric and thought this would be a great way to use up scraps and my remaining yardage. This is my first finished block, although since this pic I finished 3 more!

this is a simple pattern and makes for easy sewing - I used this tutorial from Ashley at Film in the Fridge. The little tiny corners are also a great way to use those little triangles left over from mitering your binding!

These blocks are a tad more difficult to chain piece, for me at least. I tend to get 3-4 projects going and then spend time at the machine chain-piecing, then chain ironing and then re-pinning new pieces and then back to the machine. How do you do it? Do you just do one project or sew one piece, then iron then pin the next piece?

9.03.2010

1+1 = 2

I finished another set of placemats to add to my mom and grandma's collection I'm making them. They already have 1 apiece and now they have 2!

They each have the same theme of fabric, but I thought it'd be fun to try different quilting on each of the 4 mats. The brown theme is my mom's and the first one had quilted square on it.

This one is my grandma's where i tried organic quilting this time....must say that i *loved* it - no boundaries and so fast! Her first mat had random circles intersecting each other (I just traced a bowl with chalk and went for it with the circles!)
4 more to go!

8.31.2010

Camera Strap

I just love this new camera strap I made. I've been wanting one for the longest time, but haven't sat down to figure it out and just do it. I had a friend request one for her mom's birthday, so I ended up with the proto-type and this one was for her mum.

I found the Cameras in Teal fabric from Hawthorne Threads. It is from the Spring 2010 line by Etsuko Furuya. The fabric was to die for - a heavier weave of linen. Very sturdy with excellent color quality. I can't wait to grow a stash big enough for an entire quilt out from this designer.

The strap is actually a sleeve that just slides over your camera strap, much prettier than the generic one on your camera now - as well as having way more cushion for your neck! This one has a backing of black 'minky' or 'fur' fabric as well as some extra padding for extra cushion.

I just love it and can't wait to make another! By the way - this was my new use for french seams. No exposed frays on the inside of this cover~! I think I may need a few to switch out depending on season and mood!

8.30.2010

Pillowcase & French Seams

I have had intentions of taking pictures and posting since the beginning of last week. But, school started as well as my new, very early and longer hours at work and with the longer parent pick-up lines full of anxious parents my free time was limited.

A last minute project I had before my little guy started preschool was to make a pillowcase for his 'travel size' pillow for nap time at school. I have made pillowcases before, but really wanted french seams on the inside and I had wanted to do the trim between main body and cuff - I finally found a super easy tutorial from Film in the Fridge and adjusted it for a toddler size pillow - we used a 'travel size' pillow from Target - so this would be perfect for car trips as well.


Sometimes when fudging my own pattern I forget to write down measurements, etc. This time I remebered and wrote down the sizes....if you are interested leave me a comment and I will give the measurements for this size pillow. It turned out fabulous and he loves it!
I *heart* french seams and have been dreaming of more ways to use them....I'll show you another one soon!